In this post we are going to look into how you can configure your LogManagement data ingestion from Kubernetes. We will configure the OMSAgent of Kubernetes LogManagement to only ingest relevant namespaces into the Log Analytics workspace.
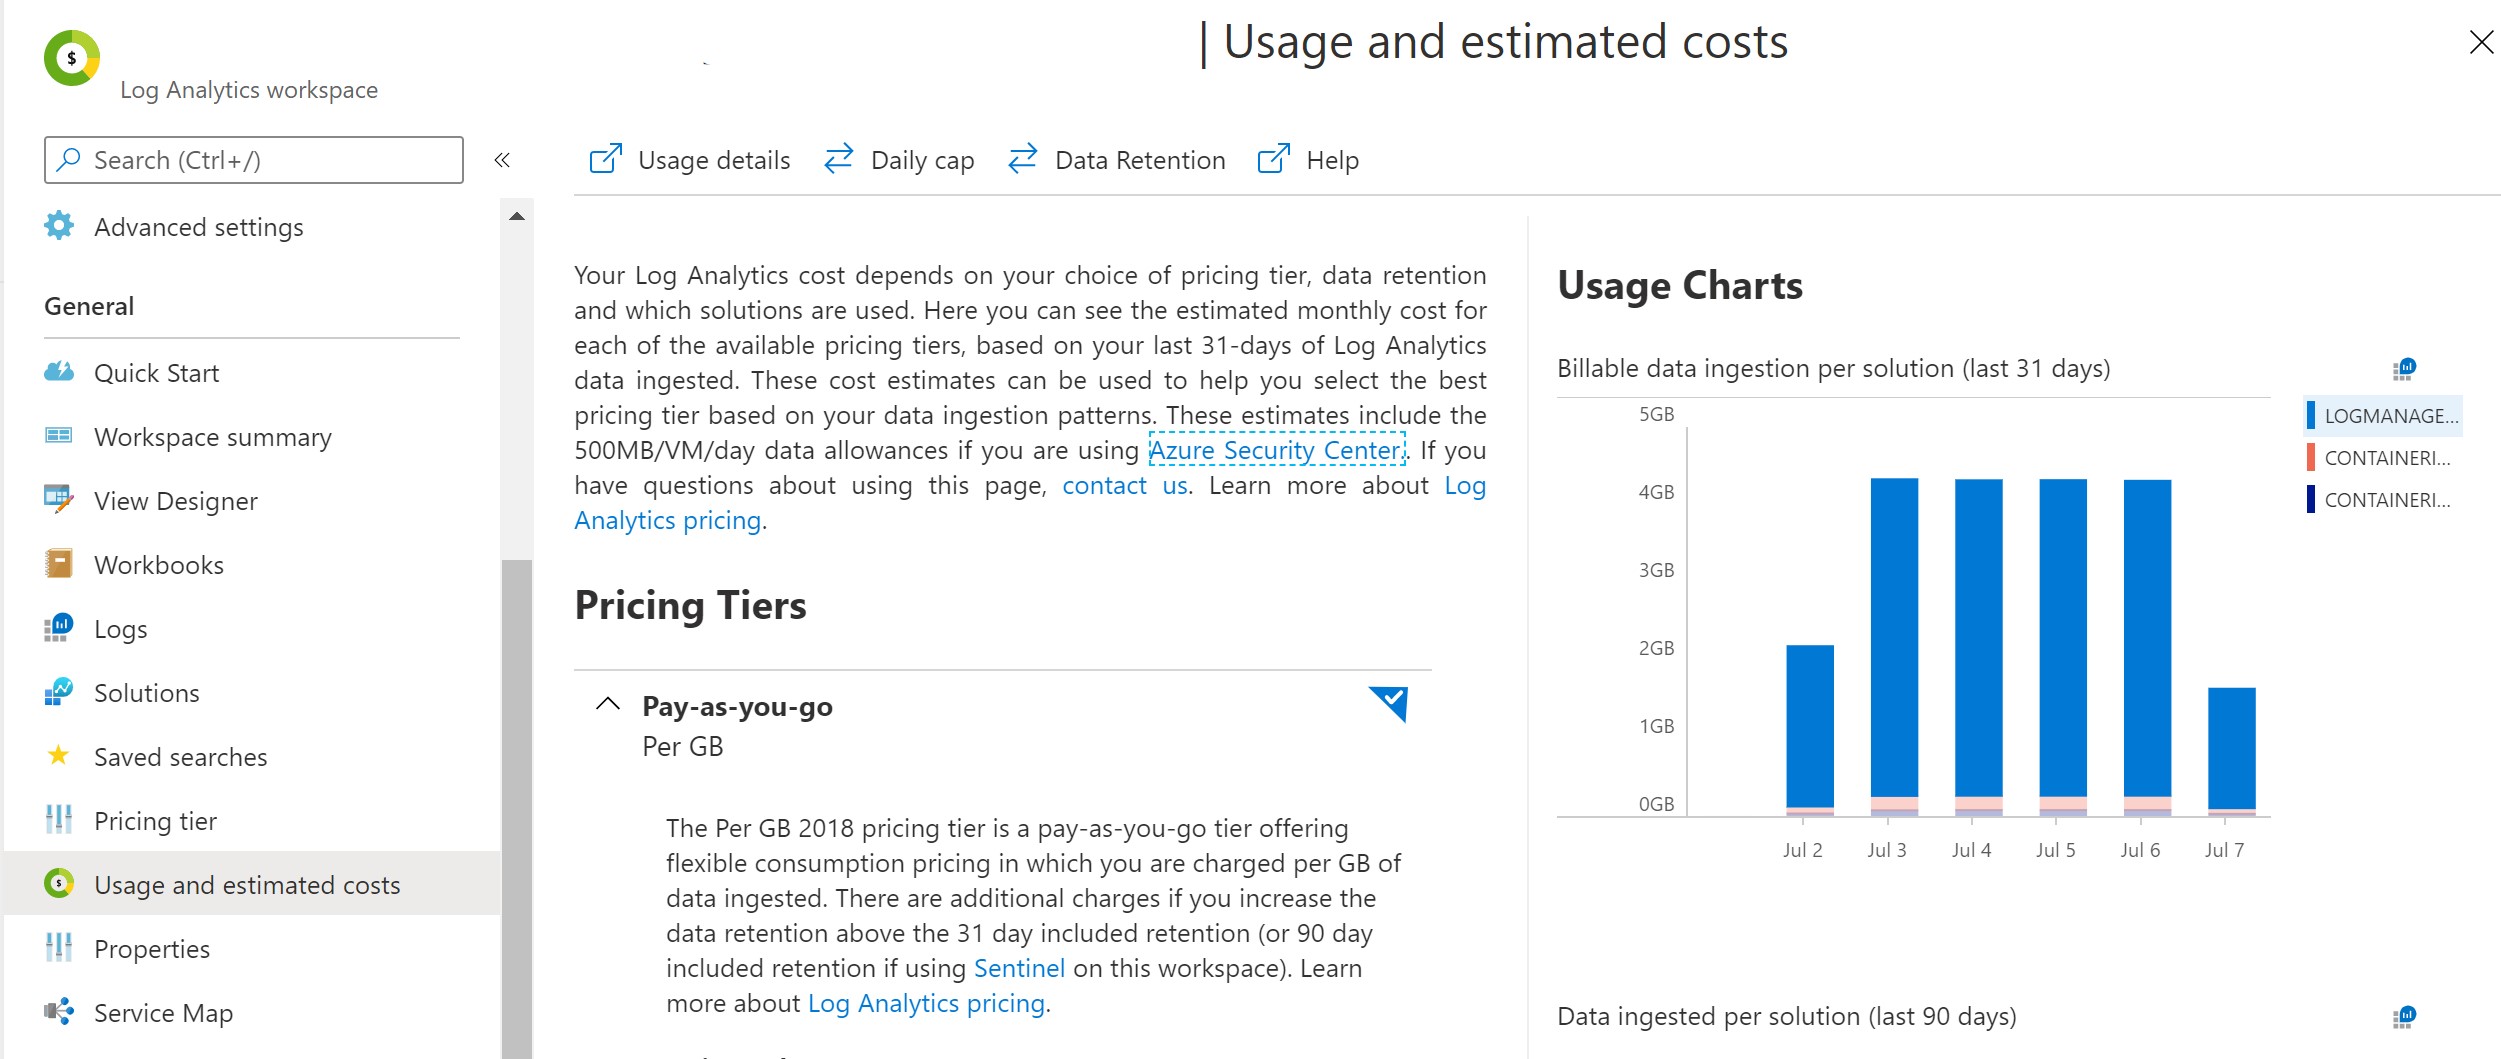
When the major cost driver of your Log Analytics workspace is LogManagement and the usage charts displays unusual high billable data ingestion per solution in the Azure Log Analytics usage and estimated costs blade - check out the blog post Investigate Azure Kubernetes Log Analytics Cost Drivers to understand the driving namespaces.
Documentation
Following the official documentation on configure agent data collection for Azure Monitor for containers we find that a ConfigMap is provided container-azm-ms-agentconfig.yaml.
To apply the default configuration save the file as container-azm-ms-agentconfig.yaml and apply it using kubectl apply -f container-azm-ms-agentconfig.yaml. The complete ConfigMap is displayed below, see Gist.
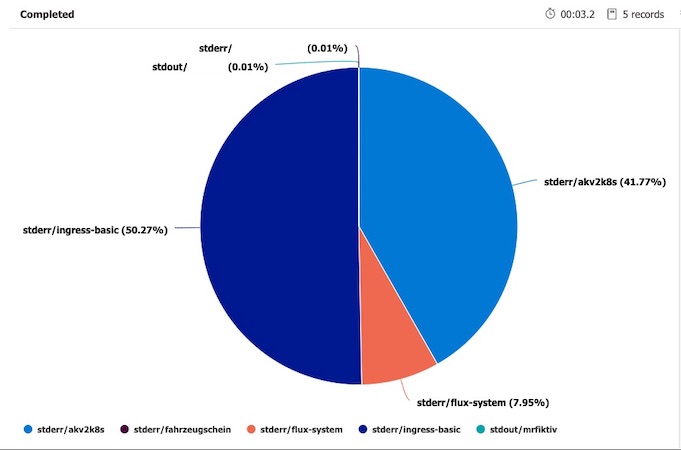
In my case NGINX, flux-system and akv2k8s generated a lot of unnecessary and costly logs that are not useful for me.
Exclude Namespaces
In order to exclude the namespaces that generate the unnecessary logs we can configure the log collection settings log_collection_settings.stdout and log_collection_settings.stderr of the container-azm-ms-agentconfig.yaml.
[log_collection_settings.stdout]
  enabled = true
  exclude_namespaces = ["kube-system"]

[log_collection_settings.stderr]
  enabled = true
  exclude_namespaces = ["kube-system", "ingress-basic", "akv2k8s", "flux-system"]
Apply the yaml again kubectl apply -f container-azm-ms-agentconfig.yaml and validate the deployment.
Info: In production this might not be applicable for you. Most of the time you want to make sure all errors and outputs are collected and stored in Azure Log Analytics.
A different approach would be to find the root cause of the outputs, fix any issue causing it and configure each service to reduce the log output. As I am only running demo workloads this is the quickest way to save costs for me.
Validation
To verify that the config map got applied correctly check the omsagent-* pod logs e.g.
kubectl get pod -n kube-system

# NAME                                  READY   STATUS    RESTARTS   AGE
# omsagent-fdf58                        1/1     Running   1          14h

kubectl logs omsagent-fdf58 -n kube-system
The output should display something like this:
kubectl logs omsagent-fb2lc -n kube-system | grep "Start Config Processing" -A 2 -B 2
# curl request to oms endpoint succeeded.
# ****************Start Config Processing********************
# config::configmap container-azm-ms-agentconfig for settings mounted, parsing values
# config::Successfully parsed mounted config map
# --
# --
# Both stdout & stderr log collection are turned off for namespaces: '*.csv2,*_kube-system_*.log'
Details
I was wondering how everything is stitched together. Here is the configuration of the ReplicaSet that set’s up the omsagent in the first place.
You can find the configuraiton in the ReplicaSet of the omsagent-rs-* see:
kubectl get rs -n kube-system

#   NAME                            DESIRED   CURRENT   READY   AGE
# coredns-748cdb7bf4              2         2         2       73d
# coredns-autoscaler-868b684fd4   1         1         1       73d
# metrics-server-58fdc875d5       1         1         1       73d
# omsagent-rs-5cb6b998dc          1         1         1       13h

kubectl describe rs omsagent-rs-5cb6b998dc -n kube-system
The ReplicaSet will display in .Volumes.settings-vol-config the ConfgMap for configuring the agent.
...
Volumes:
  ...
   settings-vol-config:
    Type:      ConfigMap (a volume populated by a ConfigMap)
    Name:      container-azm-ms-agentconfig